
Deploy and Query Gemini Enterprise: A Complete GENAI082 Walkthrough
The written companion to Episode 1 of the Gemini Enterprise practice series — from zero setup and Google Drive integration all the way to extracting accurate answers from your company's own files.
Your company's critical documents are scattered across Google Drive, meetings live on Calendar, and finding anything takes forever. That is exactly the kind of information fragmentation that Google's enterprise AI platform, Gemini Enterprise, was built to solve. It stitches scattered data together and turns it into an AI assistant that can search, summarize, and even send calendar invitations — and its answers are grounded in your actual company files, not hallucinated.
This article is the written version of Episode 1 of the Gemini Enterprise practice series (video). It walks you through the Google Cloud Skills Boost lab "Deploy and Query Google Gemini Enterprise" (lab ID GENAI082), the same ~65-minute journey, step by step.
1. What Gemini Enterprise Is
First, let's frame the problem it solves. Important company materials are scattered across Drive and Calendar, and merely searching for them is a chore. Gemini Enterprise links that scattered data into one and evolves it into an AI assistant that handles search, summarization, and calendar invitations.
This episode is aimed at three kinds of people:
- In-house administrators
- Cloud engineers
- Anyone considering a serious AI rollout over their own company data
The series has multiple episodes. Episode 1 (this one) covers setup from zero, Google Drive integration, and pulling accurate answers from company files. Future episodes will cover custom agents and Deep Research.
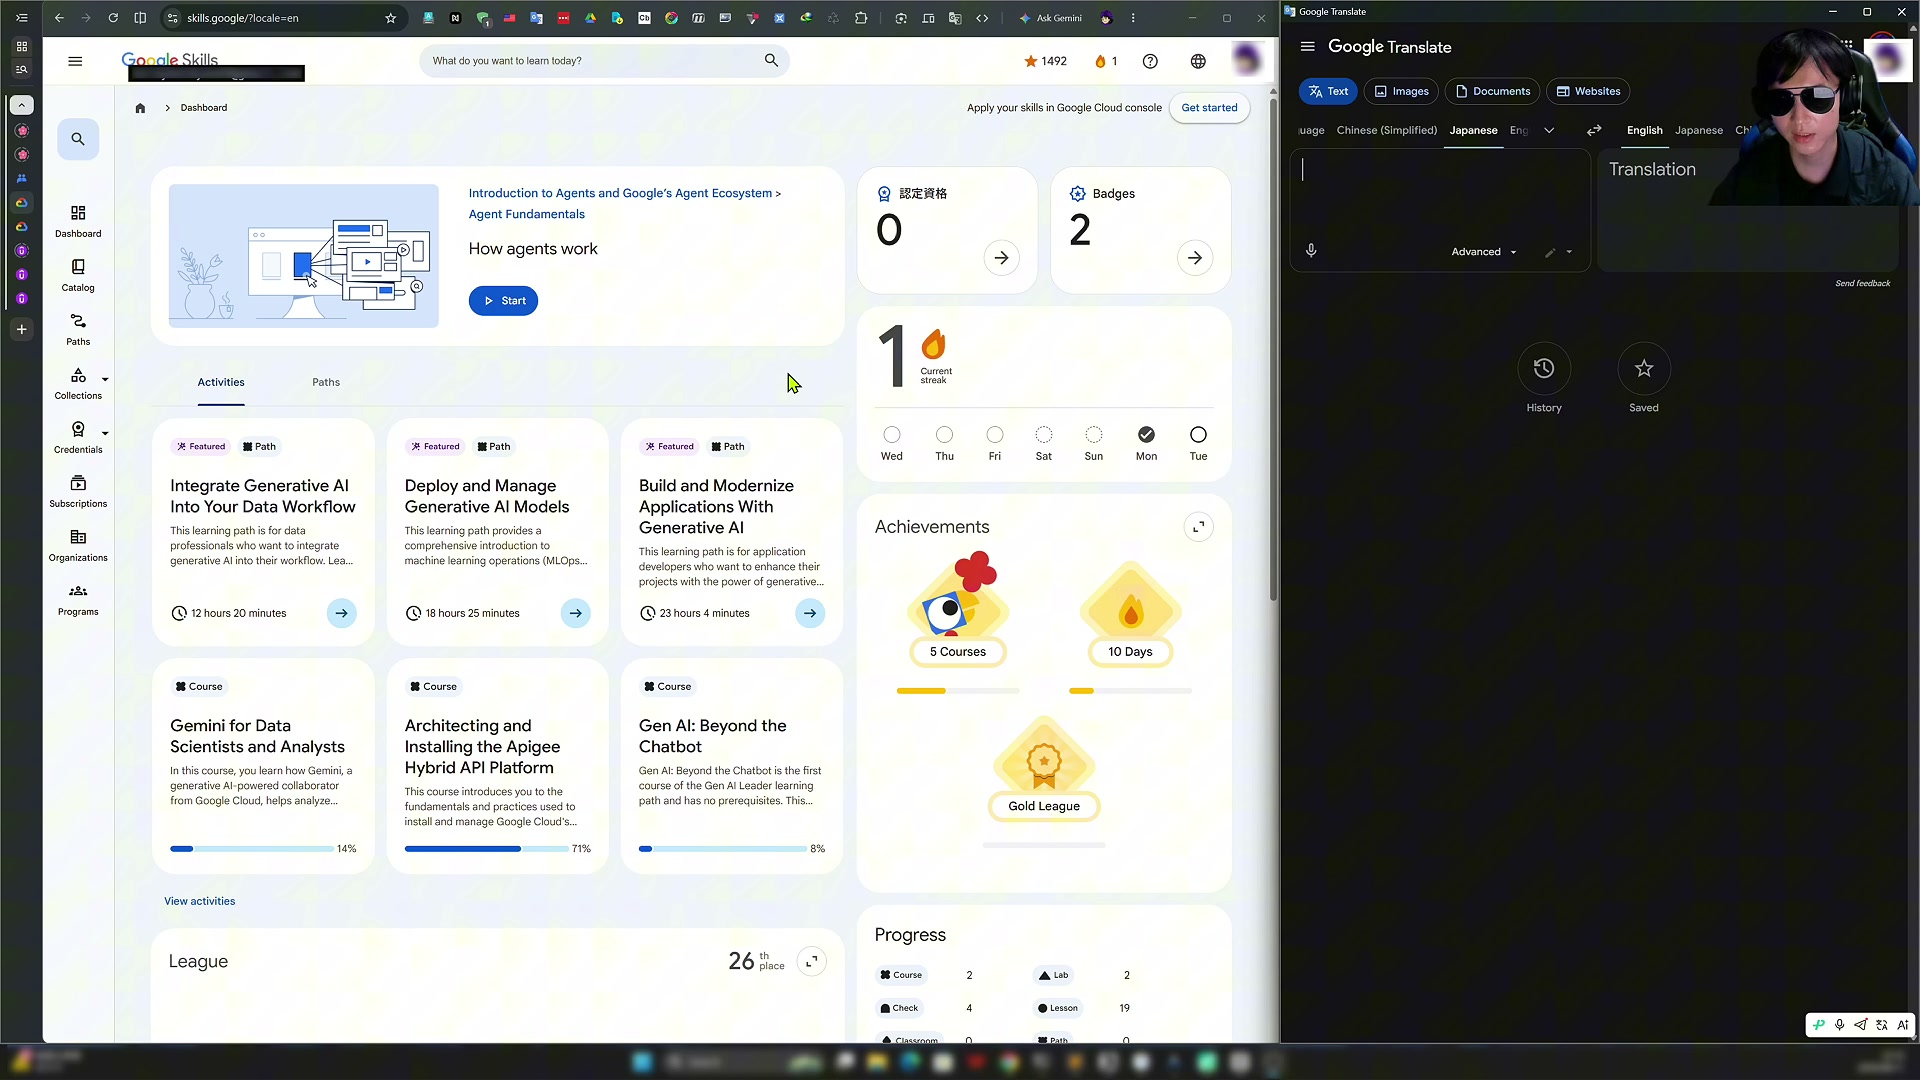
2. Preparation: Google Cloud Skills Boost
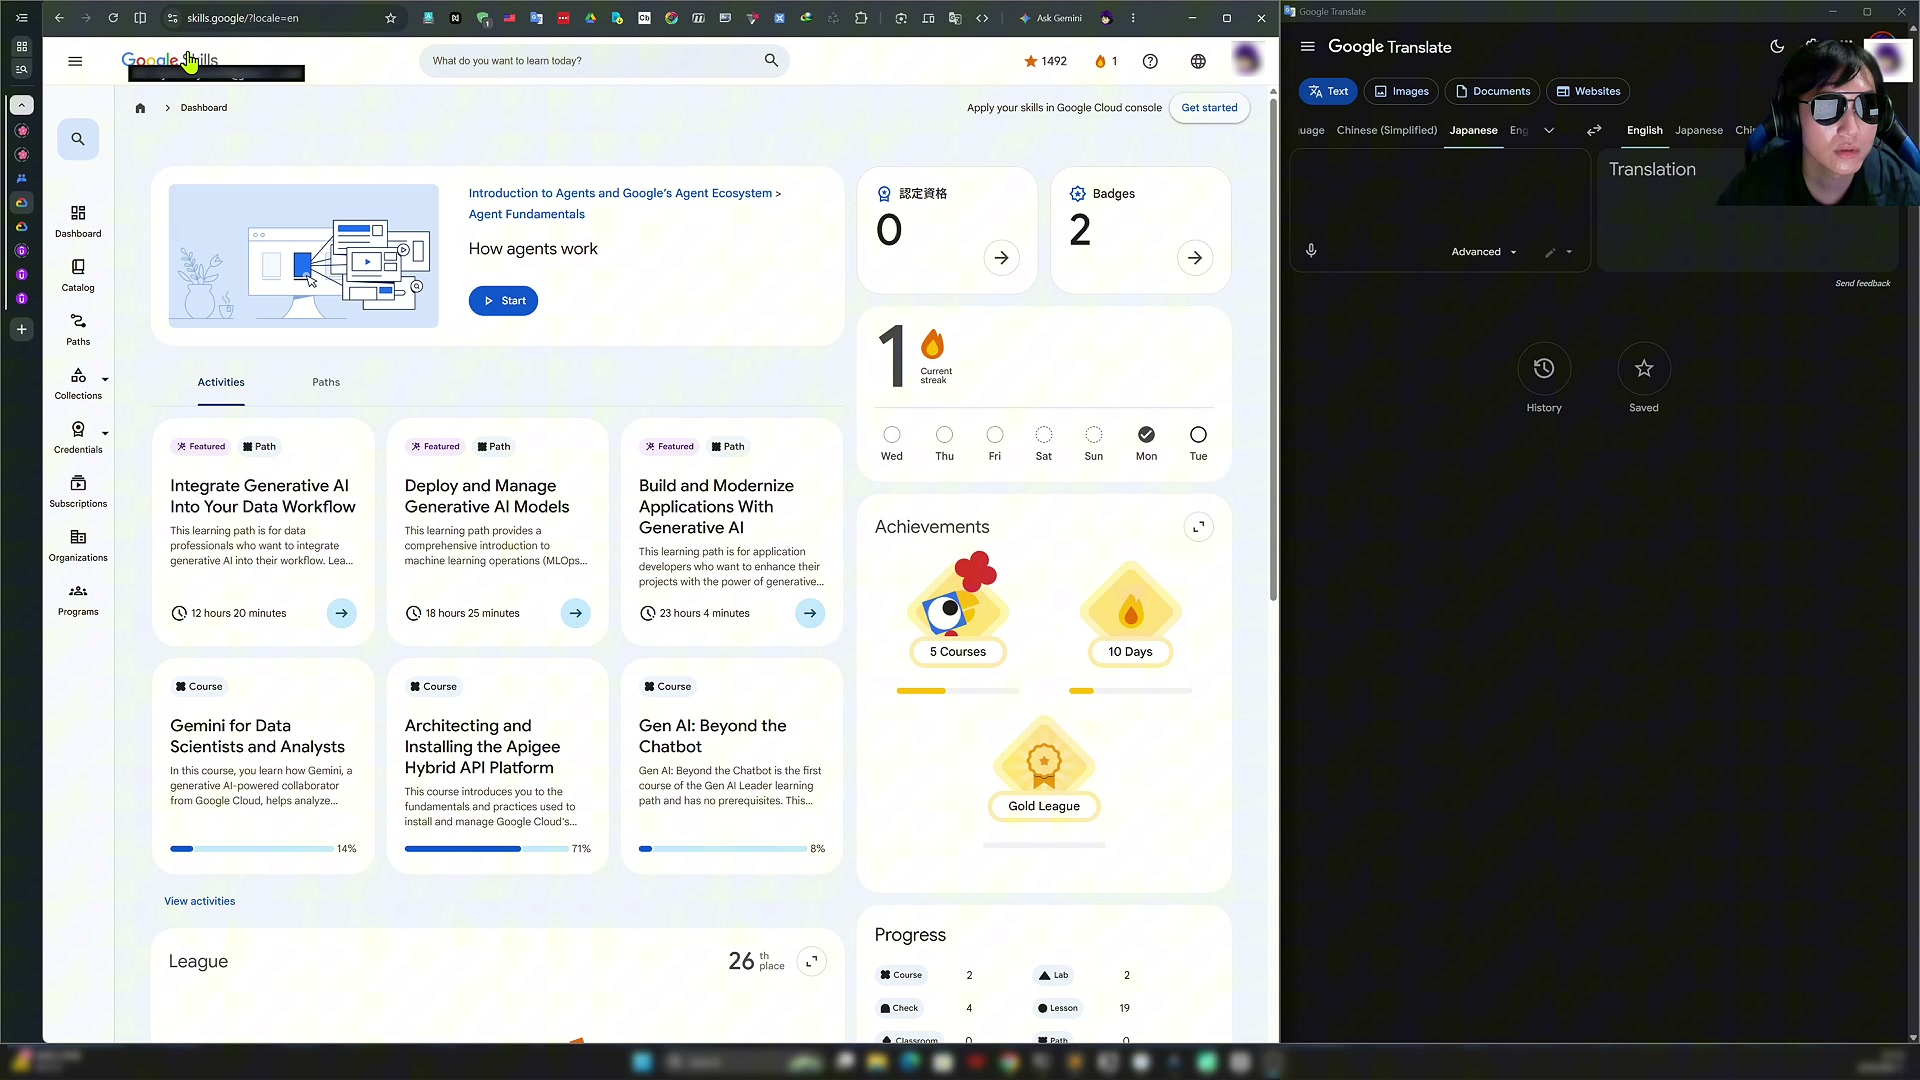
The material comes from Google Cloud Skills Boost (formerly Qwiklabs) — a Google Cloud–focused training portal. It targets a broad audience, not just developers, and a great deal of training is available for free.
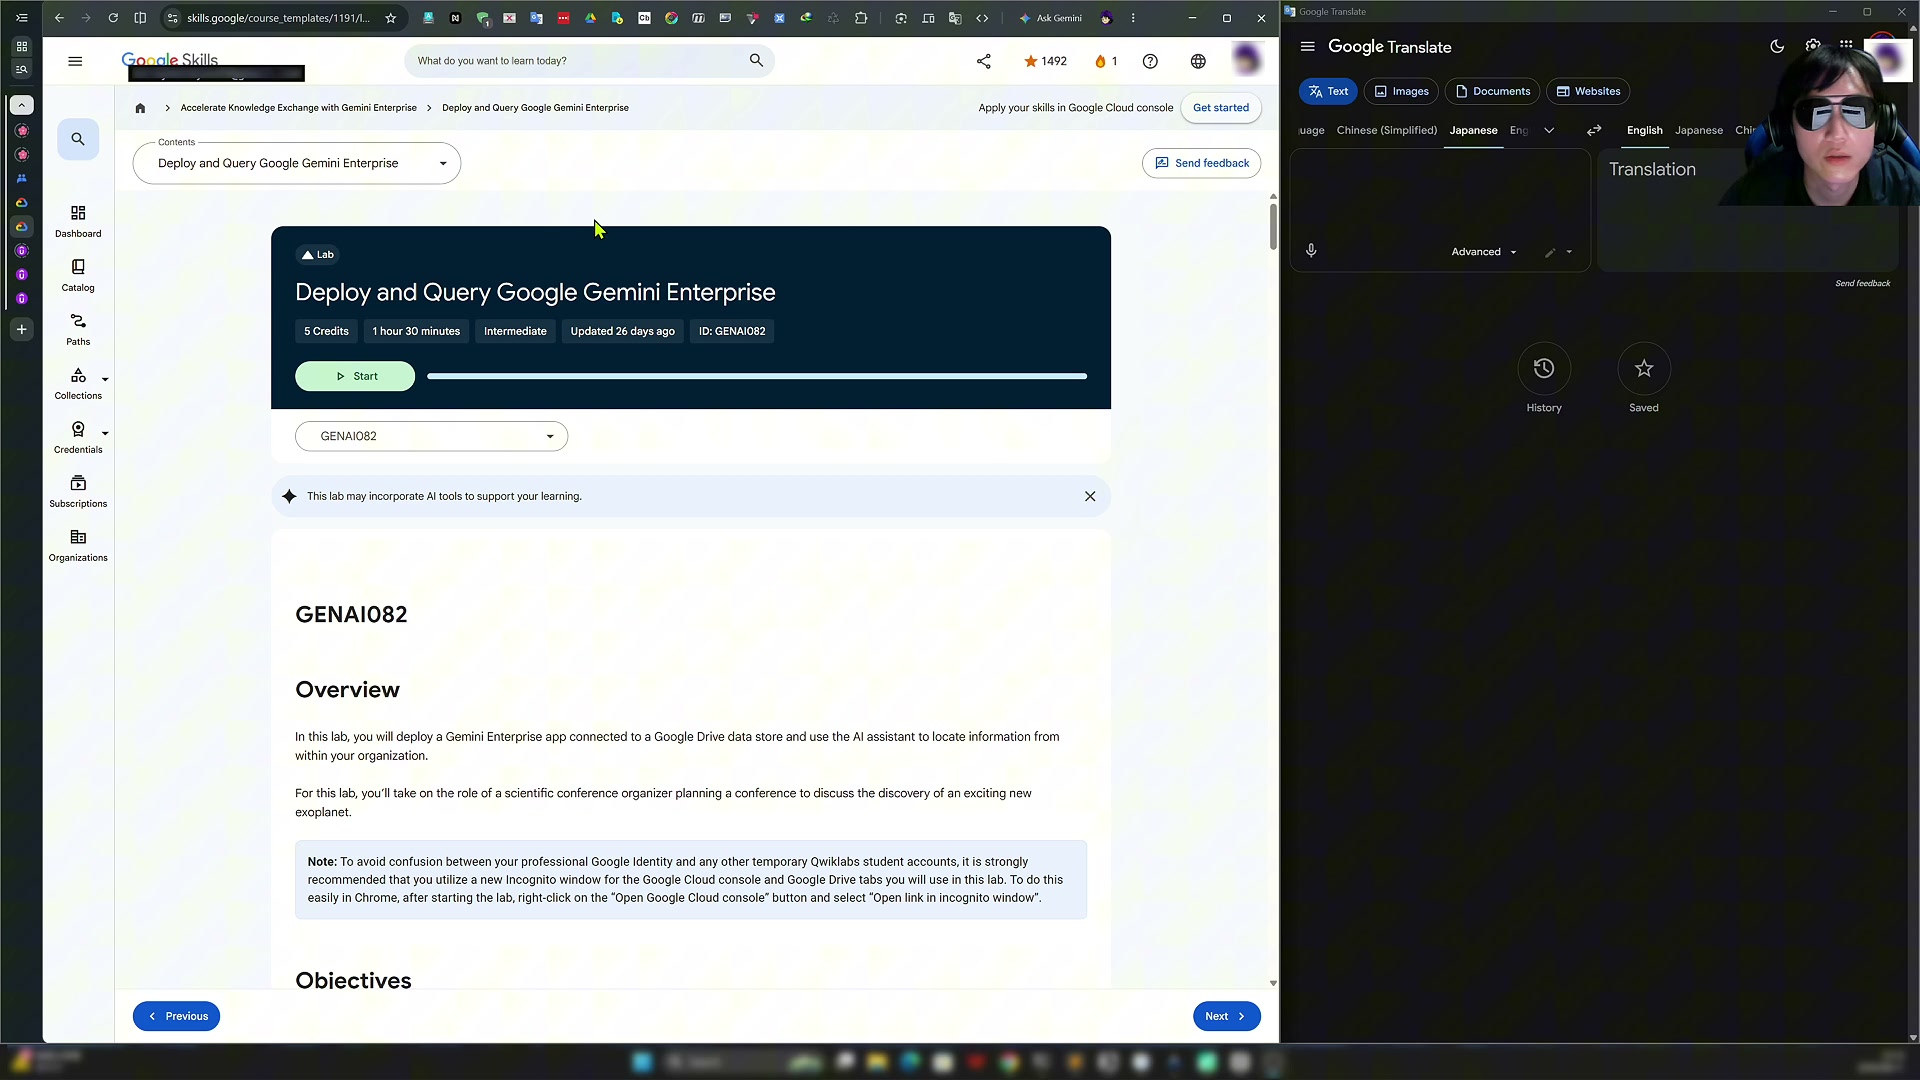
The lab we're doing today is "Deploy and Query Google Gemini Enterprise." On the lab detail page, confirm the title and the lab ID (GENAI082), then click Start. A timer starts counting down — you must complete the lab within the time limit.
Tip: Gemini Enterprise offers a 30-day free trial, and you can create new accounts to retry the lab as many times as you like — very cheap practice.
3. Enter the Console: Use an Incognito Window
Clicking Start redirects you to the Google Cloud console. One important caution: you must open it in an incognito window. The lab automatically signs you in with a temporary account, so it never gets mixed up with your personal one.
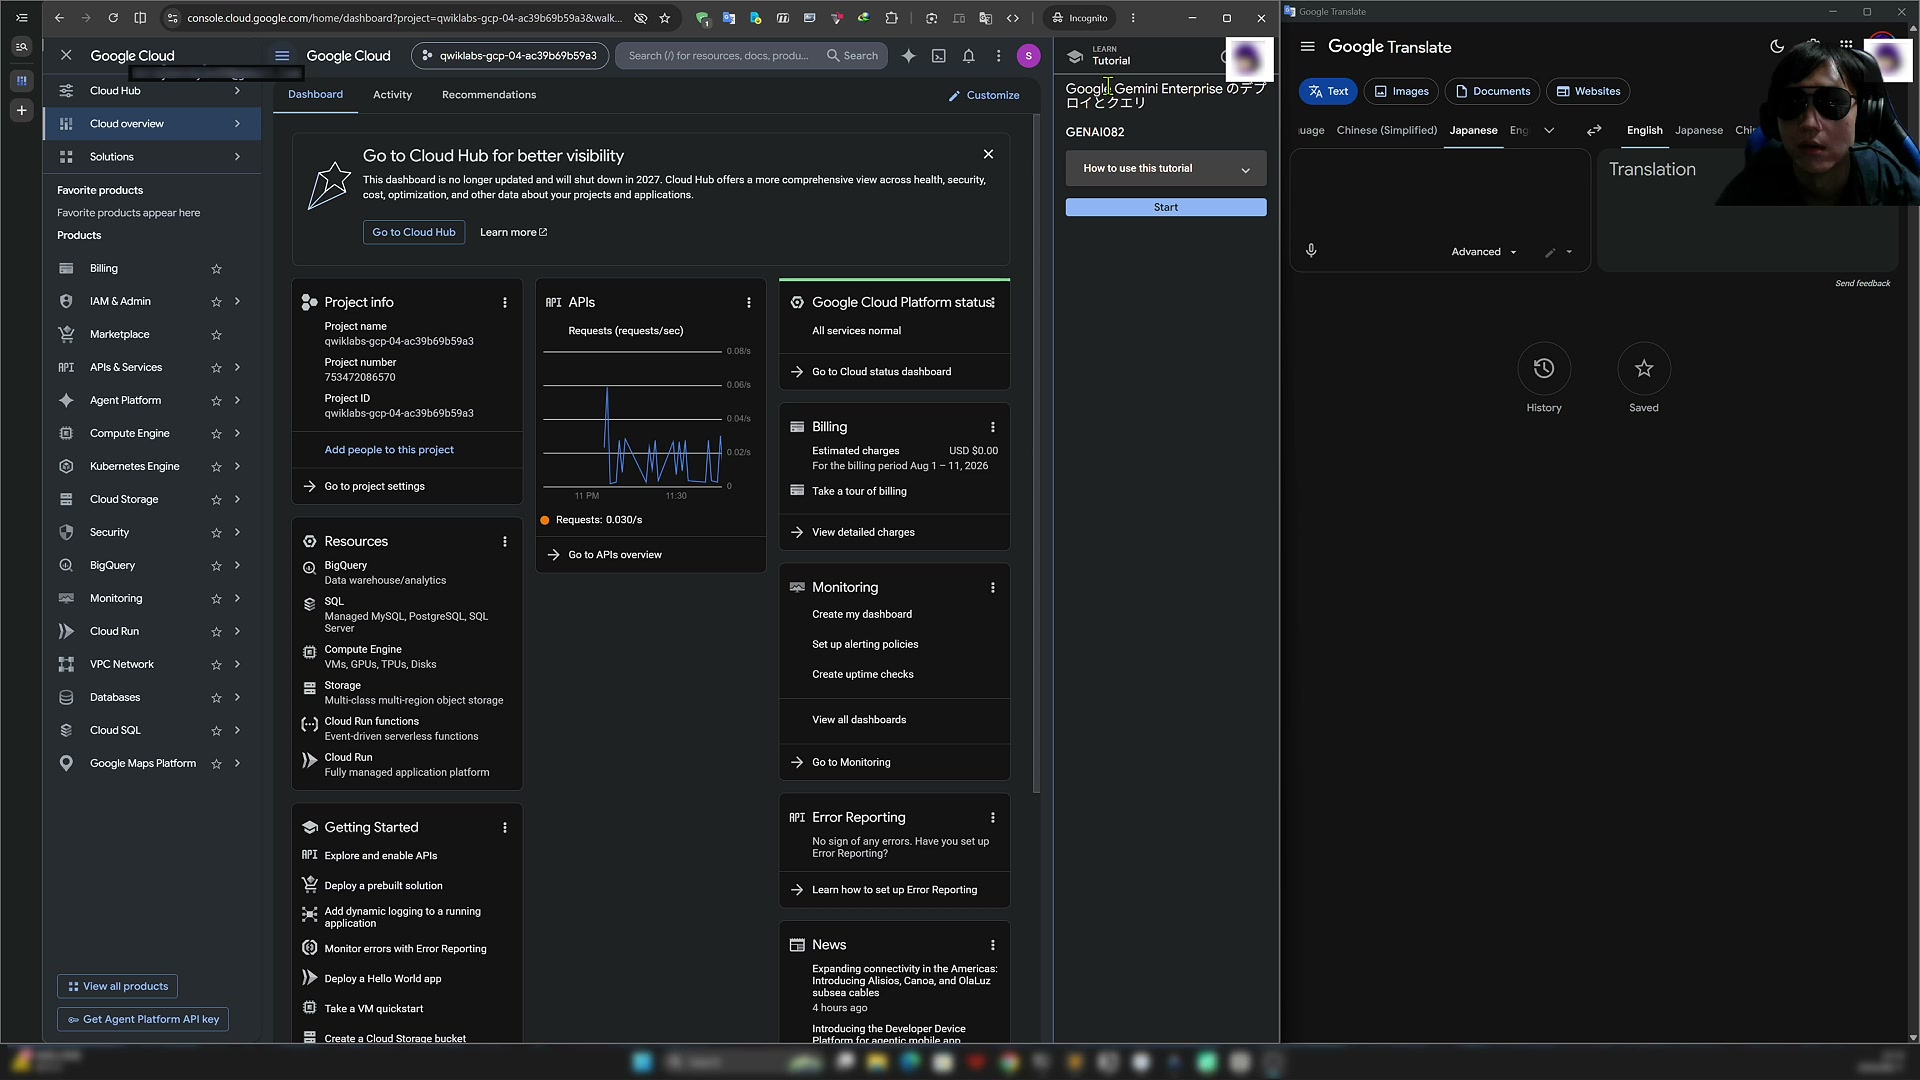
The recommended workflow from here on is a split screen: the lab instructions on the left, the actual console UI on the right. Work through them side by side.
4. Task 1: Prepare the Data (Bucket → Drive → Calendar)
Task 1 is about preparing data for the rest of the lab: download two files from Cloud Storage, upload them to Google Drive, and create a calendar event.
Step 1 — Find the bucket and download the files. On the Cloud Storage page, locate the bucket provisioned for the lab (hover over it to confirm), then download the two required files.
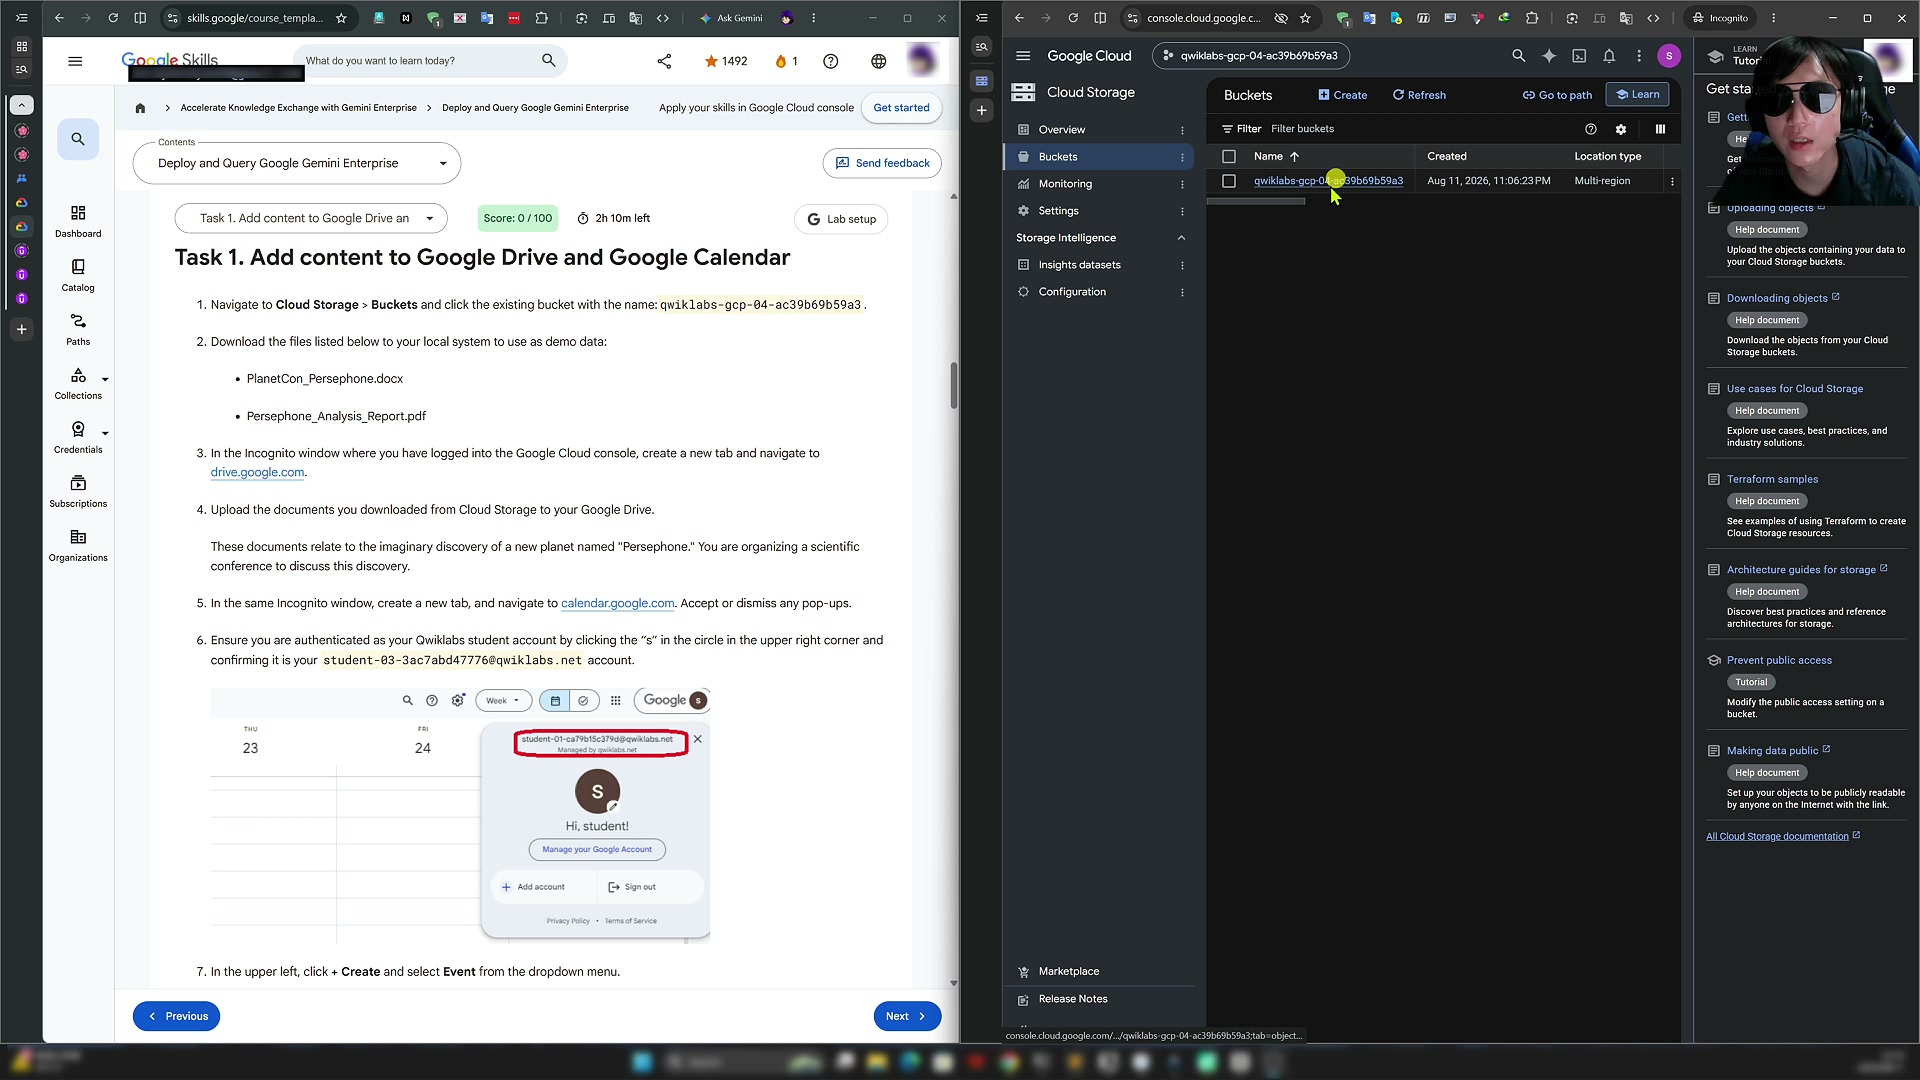
A common gotcha here: clicking the download button may open the file in a new tab instead of downloading it. The workaround is to right-click the download button → "Save link as." That saves the file locally without issues.
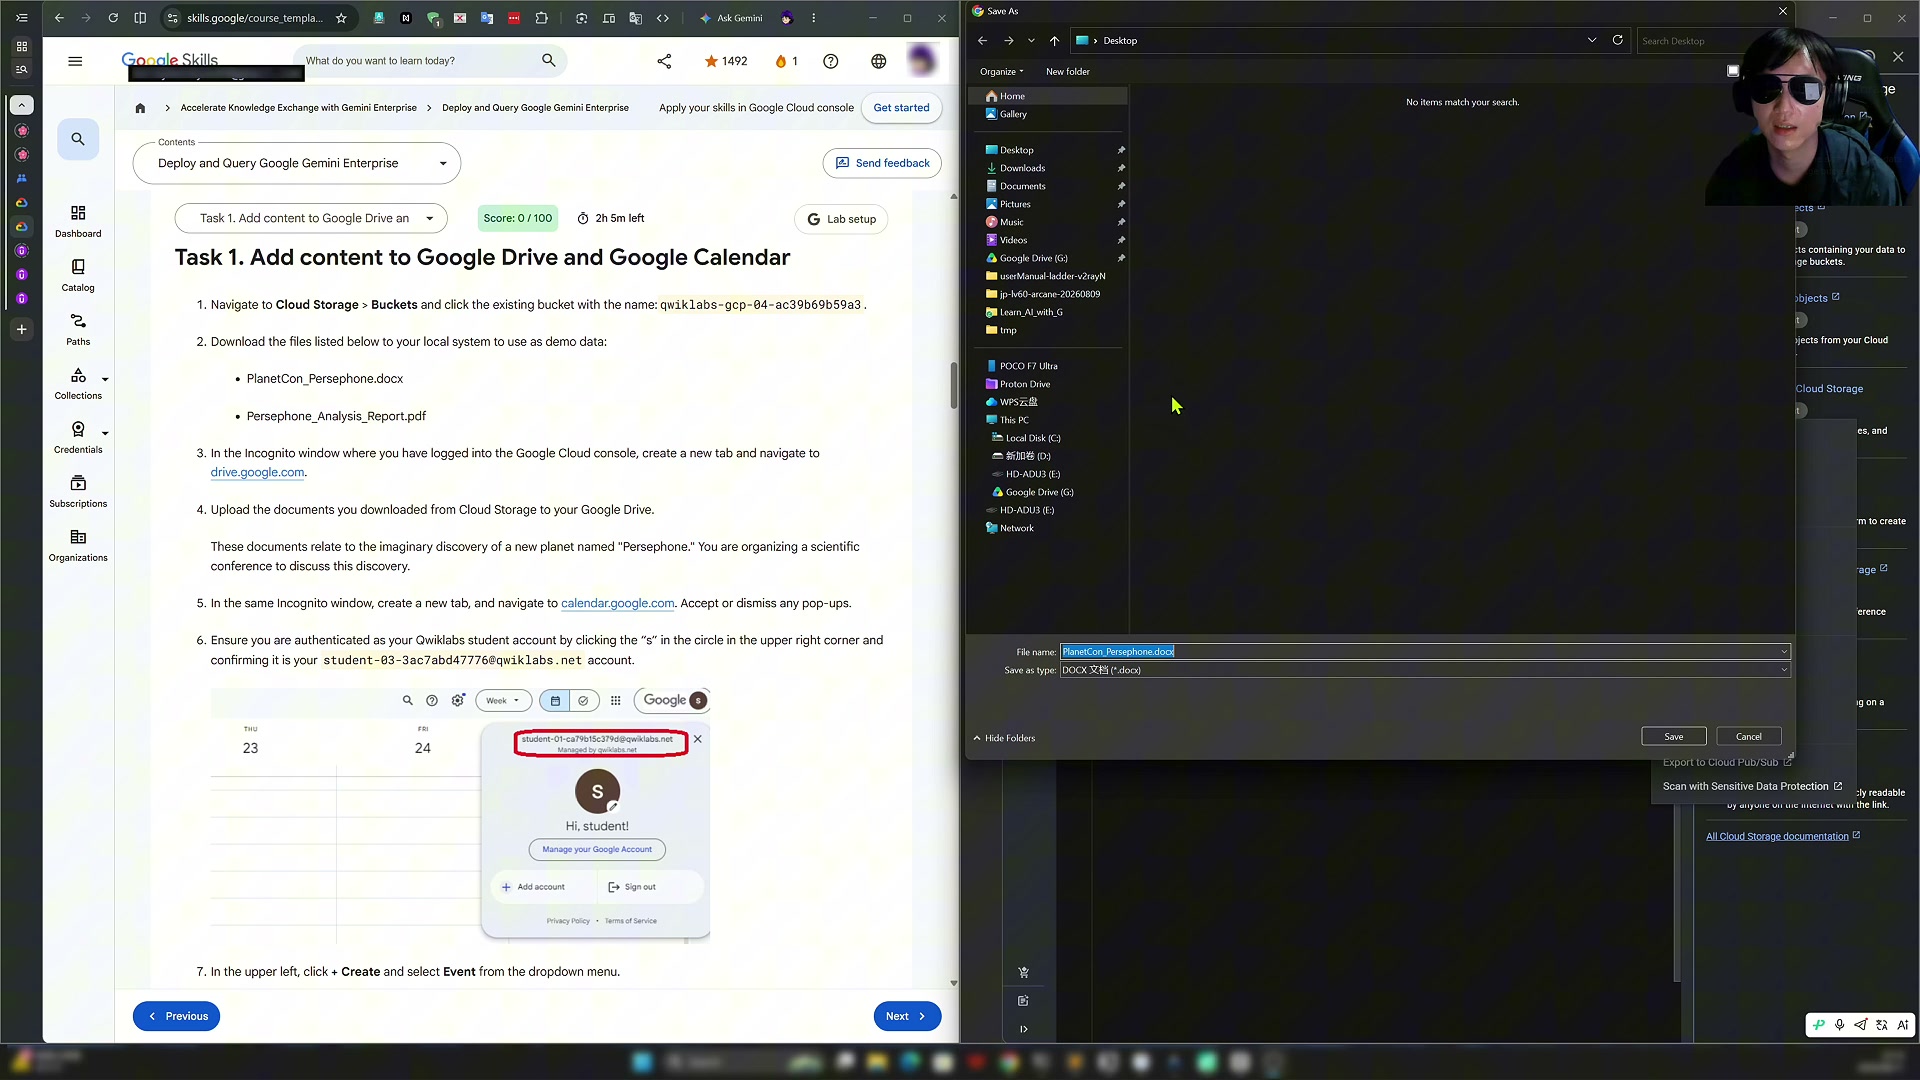
Note: the bucket only supports batch operations via CLI, so the web UI can only download files one at a time.
Step 2 — Upload to Google Drive. In this lab, your role is the organizer of a Scientific Conference. In the same incognito window, open Drive and upload the two files you just downloaded.
Step 3 — Create a calendar event. Open Google Calendar, click Create → Event, name it exactly as the lab specifies, and set the start time at least one hour from now (the video sets it for tomorrow). Save, return to the instructions, and click Check My Progress — Task 1 done.
5. Task 2: Create the Gemini Enterprise App and Configure Its Identity Provider
Back in the Google Cloud console, search for Gemini Enterprise in the top search bar and open the product page. Task 2 is to create a Gemini Enterprise app and configure its identity provider.
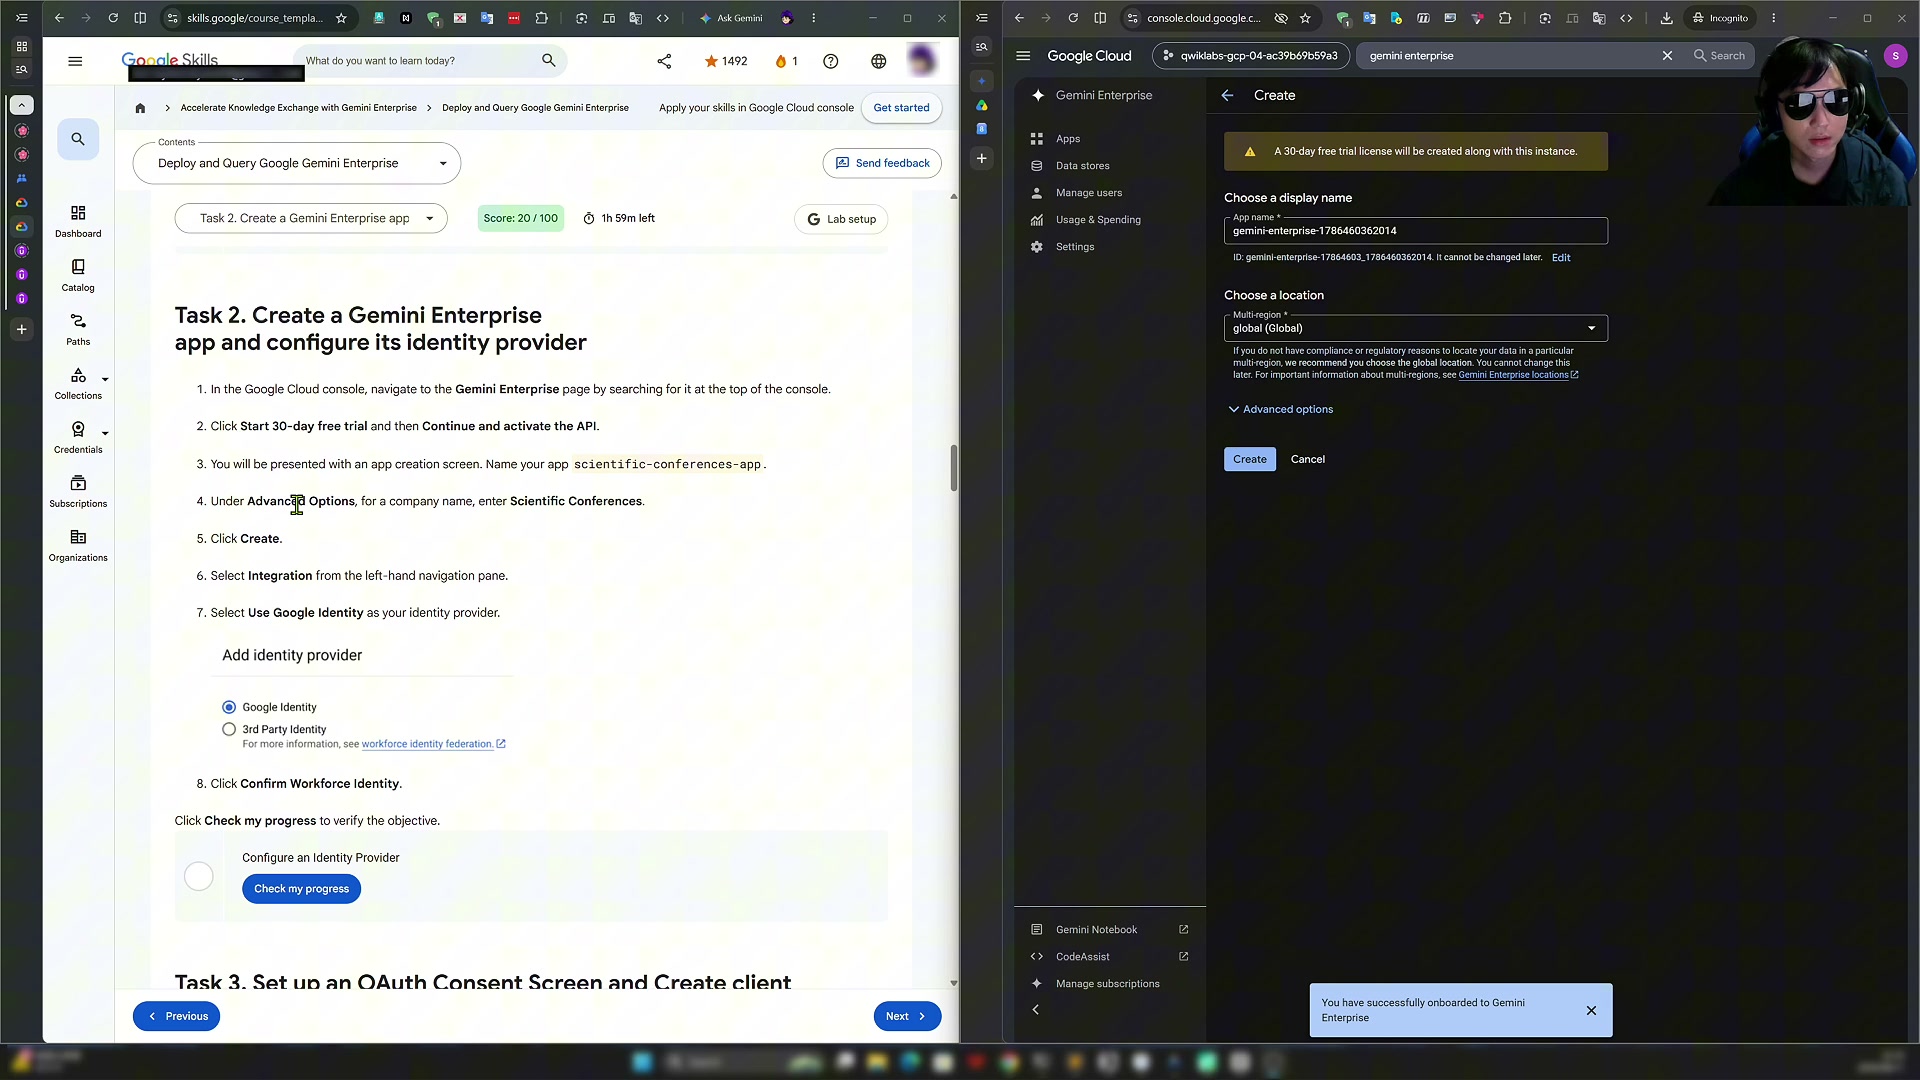
On the app creation screen:
- App name: follow the lab instructions strictly — the lab validates it.
- Location: keep the default Global.
- Open Integration in the left-hand navigation and enter the company name in the advanced options.
Click Create. When creation finishes, a success toast appears at the bottom and an Integration module shows up in the left navigation panel.
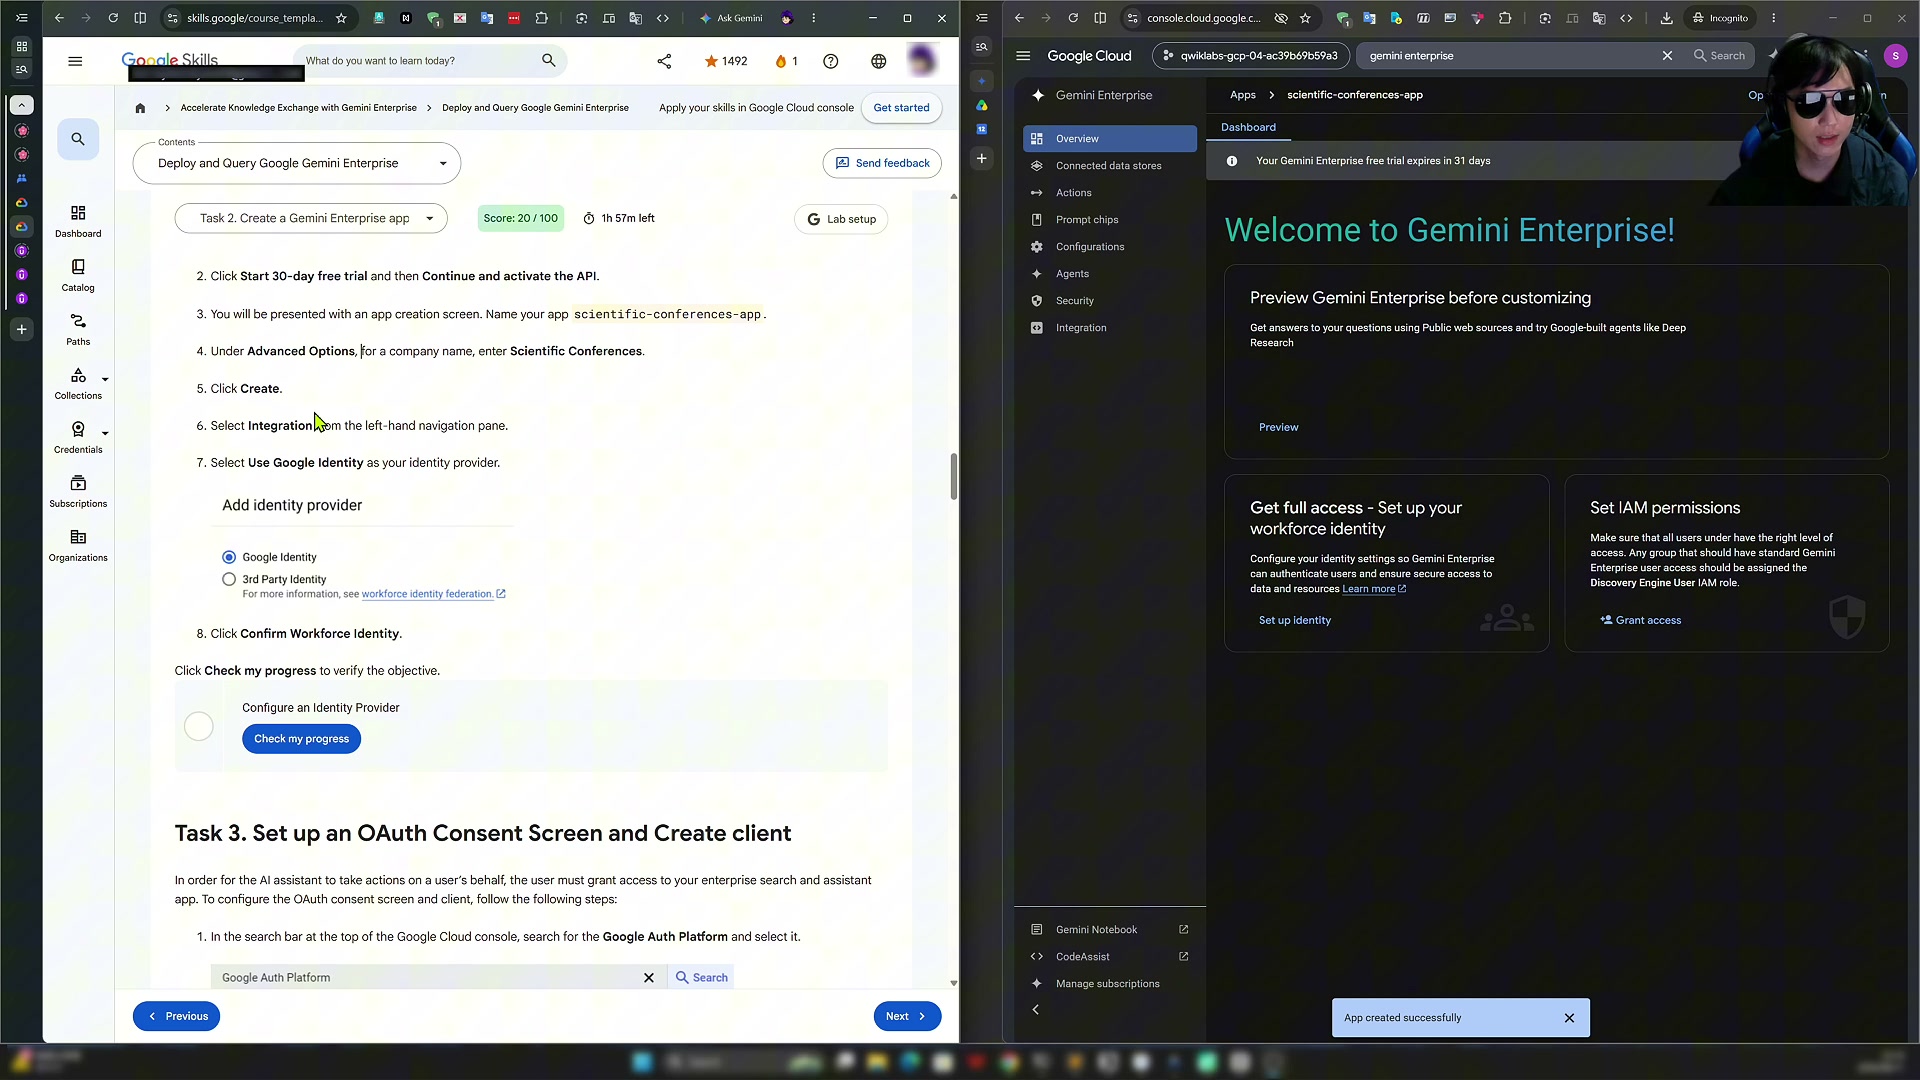
Next, open Integration and select Google Identity Provider (Use Google Identity Provider / Workforce Identity Federation). In other words, Gemini Enterprise authenticates users through Google's identity infrastructure. You can also connect your own identity provider — anything implemented on the OpenID spec (services like Entra ID) works.
Confirm the configuration, then Check My Progress back in the lab. Task 2 complete.
6. Task 3: Set Up the OAuth Consent Screen and Create a Client
For the AI assistant to take actions on a user's behalf — reading/writing Drive, creating calendar events — you need OAuth.
Step 1 — Configure the OAuth consent screen. Search for Google Auth Platform in the console's top search bar and click Get Started:
- App name: per the lab (Scientific Conferences App)
- User support email: your lab-assigned Quicklabs student account
- Audience: select Internal — available only to users within your organization, and you won't need to submit the app for verification. That's the recommended choice for this lab.
Fill in the contact info, agree to the terms, and click Create. The OAuth app is created.
Step 2 — Create an OAuth client. The console shows a banner that you haven't created any clients yet. Click Create OAuth client:
- Application type: Web application
- Name: per the lab
- Authorized redirect URIs: enter the URI the lab specifies
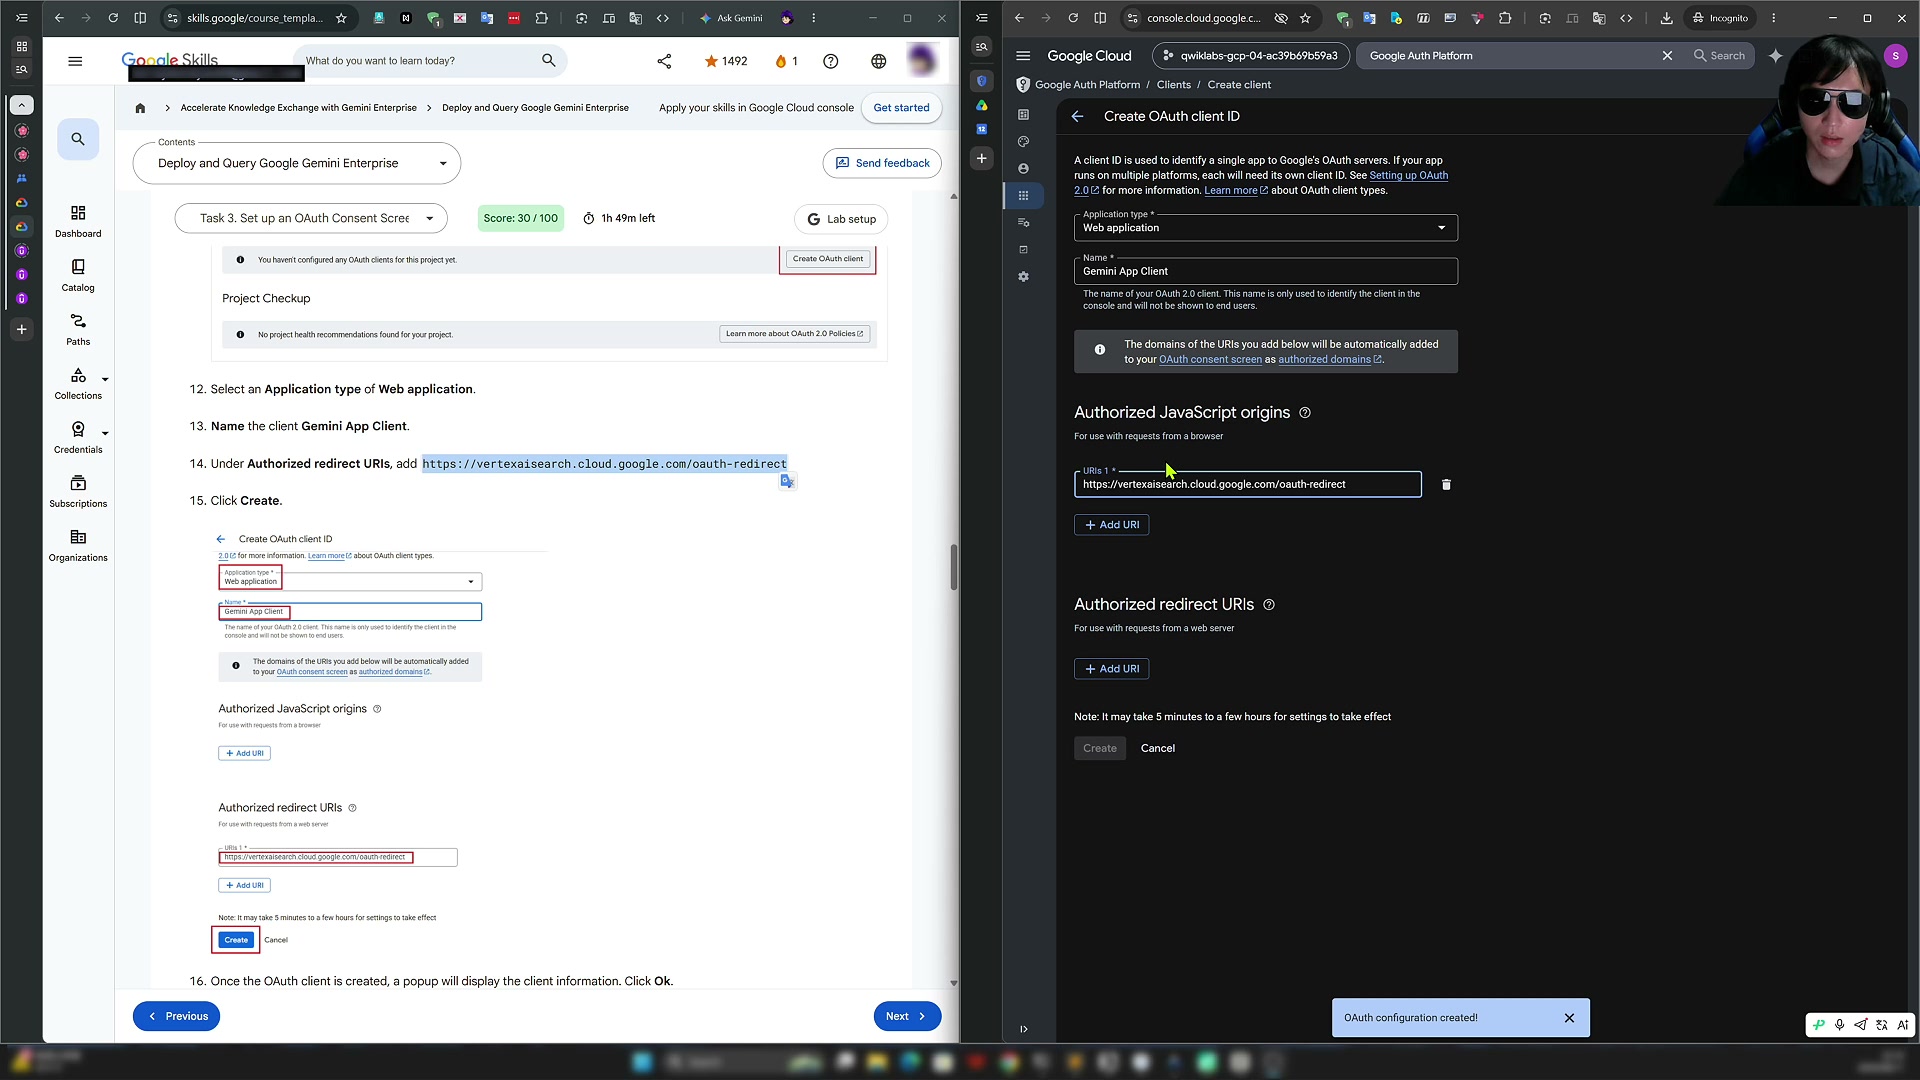
That redirect URI is precisely the address of the Gemini Enterprise web application. It also carries a security property: only you, the app owner, can configure this address, so nobody else can sneak their own service in. Fun fact from the video: the author briefly misread the tutorial screenshot and typed the URI into the wrong field — if your screen doesn't match the docs, double-check the input location.
Step 3 — Save the credentials. Once the client is created, a popup shows the Client ID and Client Secret, with a Download JSON entry. Download the config file, and also copy the Client ID and Secret into a text document — you'll need them very shortly.
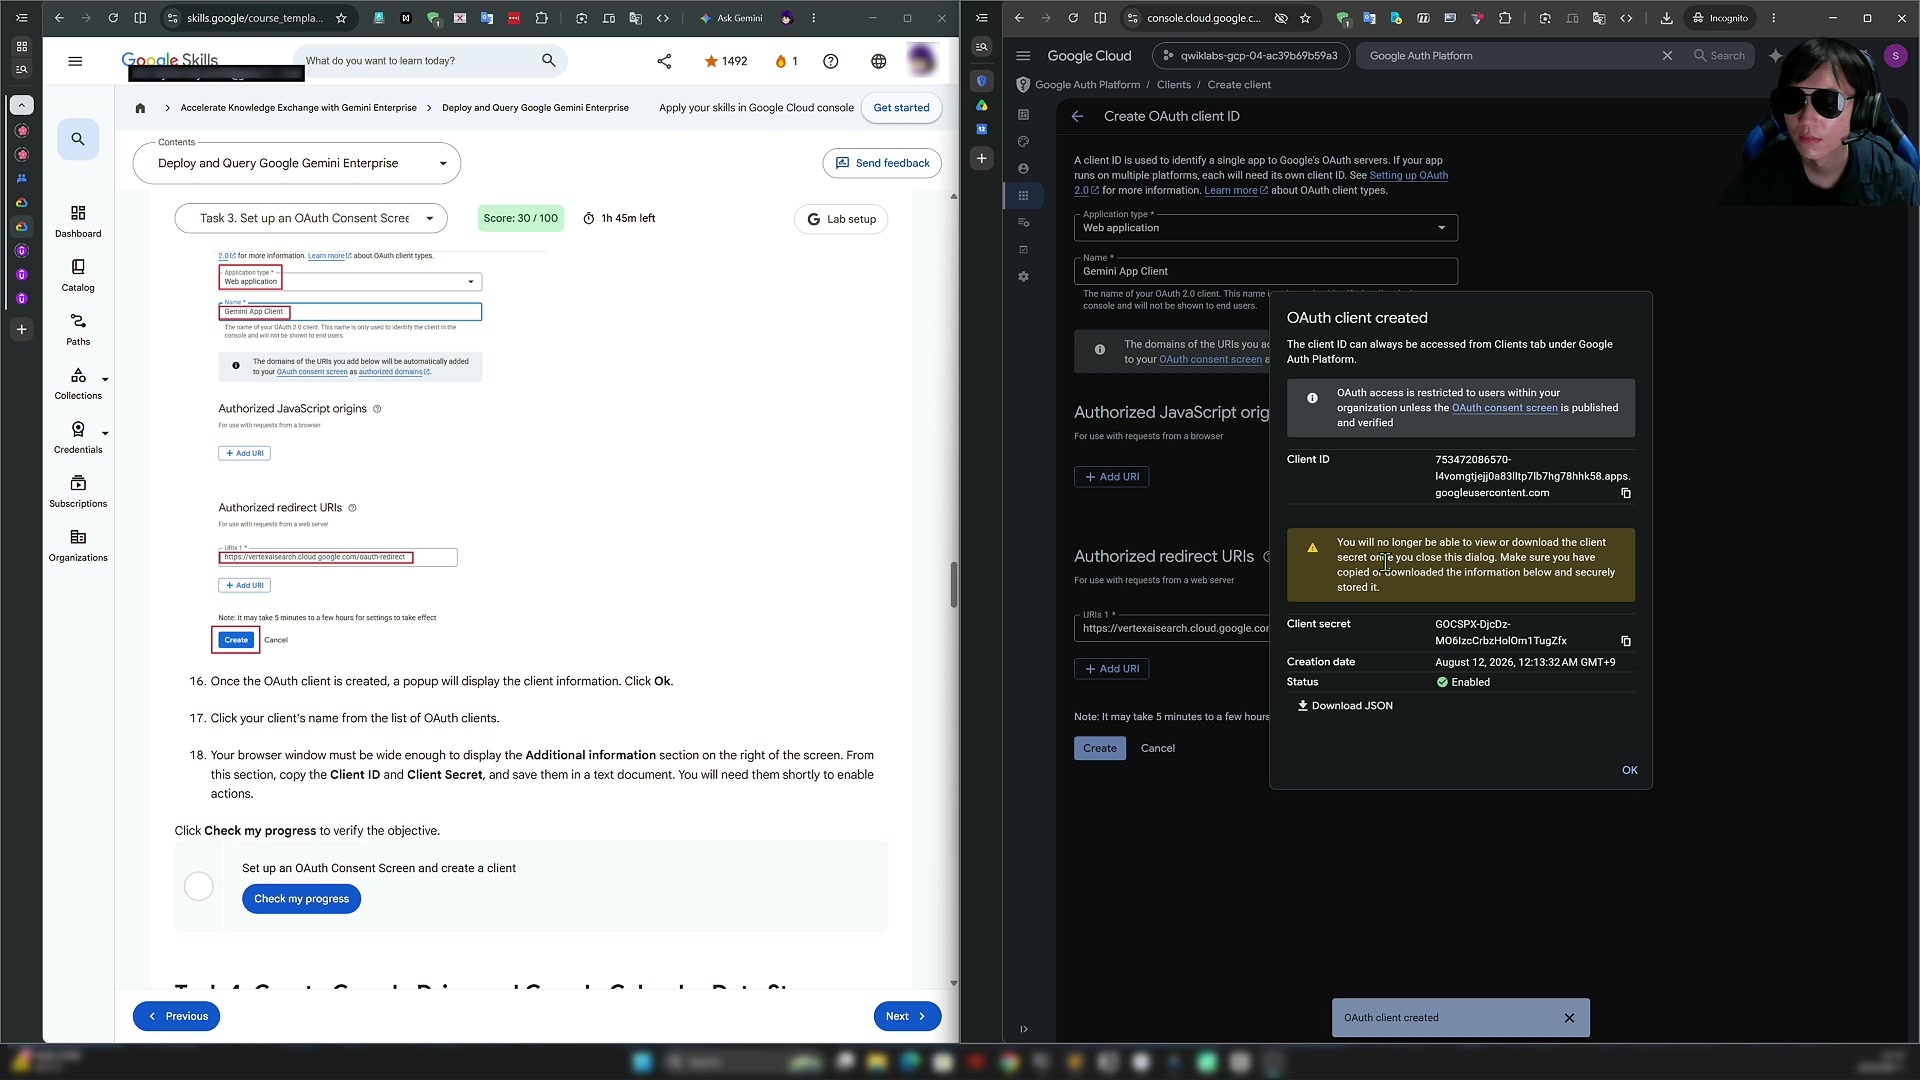
Back in the lab, Check My Progress. Task 3 complete.
7. Task 4: Connect the Data Stores (Google Drive + Calendar)
Now the main event: connecting data sources. Return to Gemini Enterprise, click the Scientific Conferences App you created, find Connected data stores in the left navigation (the second item), and click New data store.
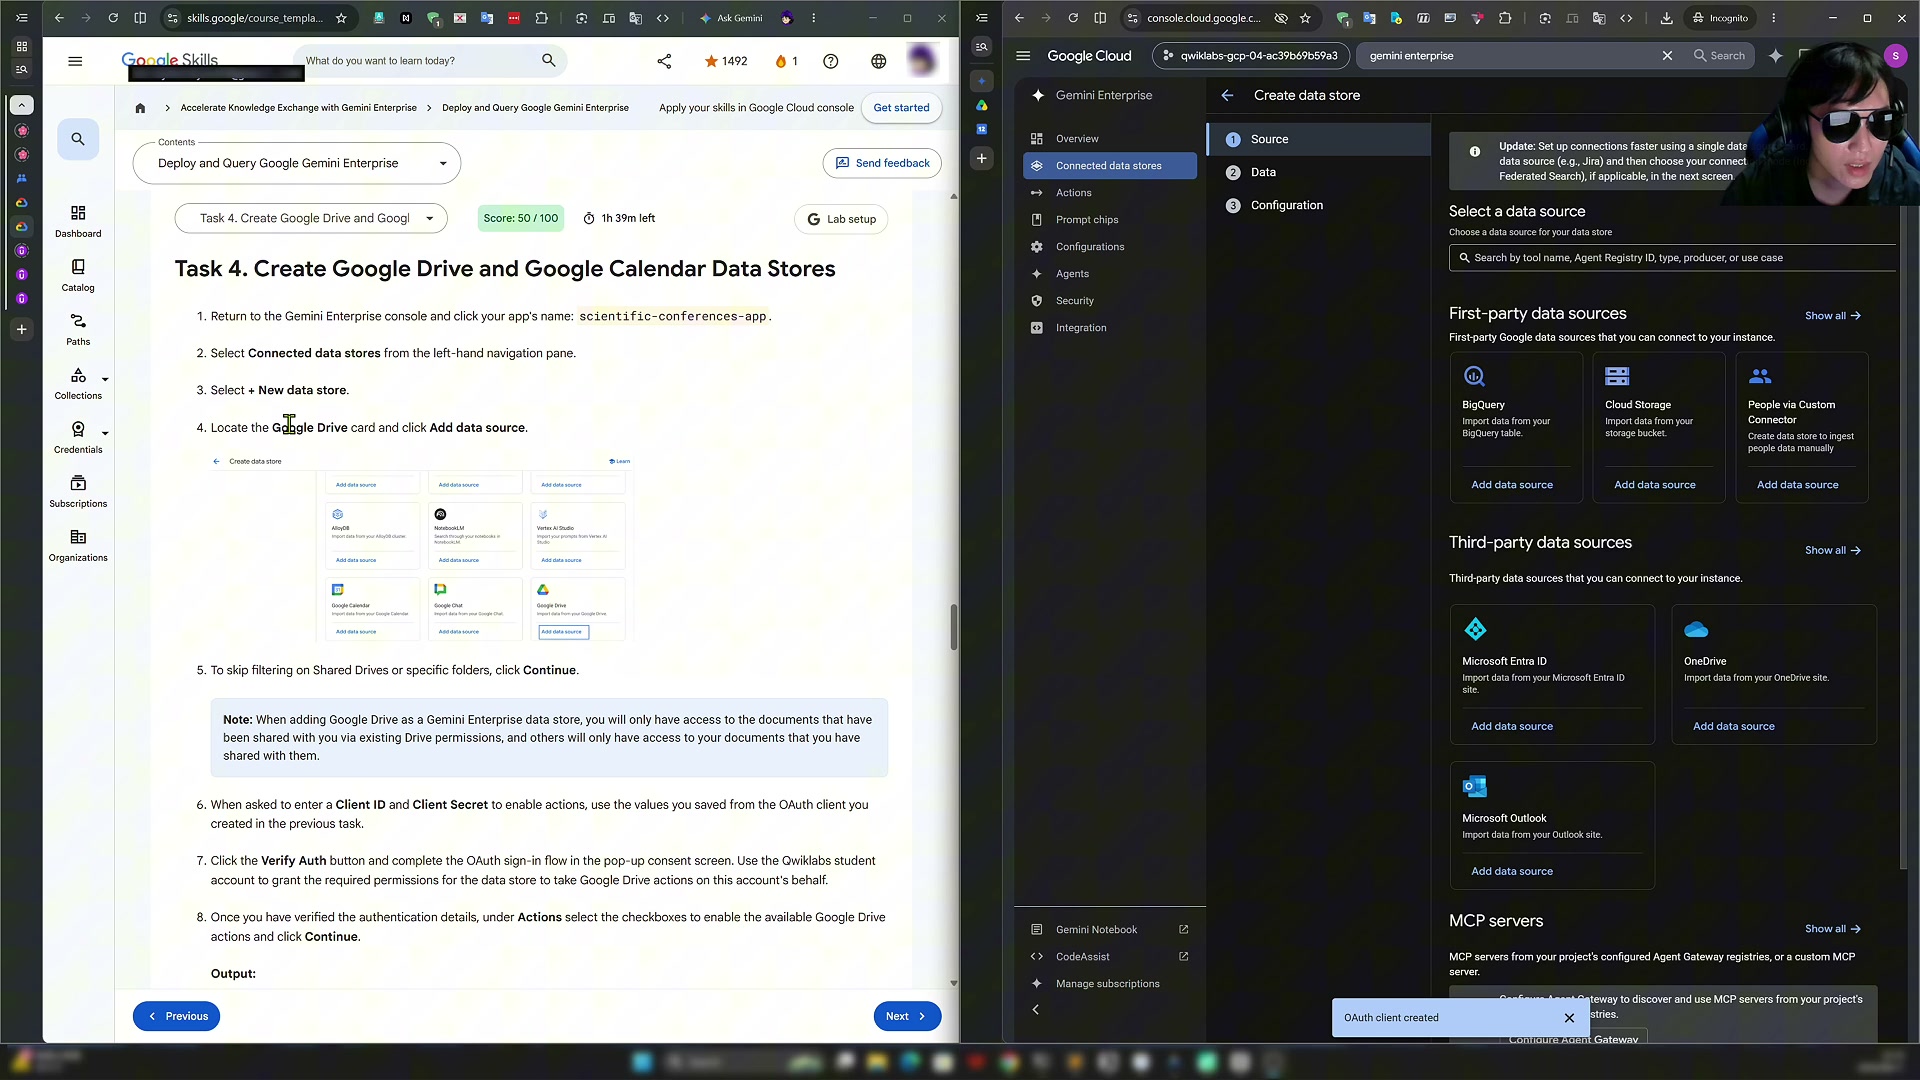
Connecting Google Drive:
- Under First party data stores, pick the Google Drive card.
- Enter the Client ID / Client Secret you saved, click Verify OAuth to authenticate, and click Allow.
- Filters: leave the defaults. This follows Drive's native permission model — only documents shared with you through existing Drive permissions are searchable, and your documents are visible only to those you've shared them with. No extra exclusion config needed.
- Check the boxes under Google Drive Actions to enable the available actions, then click Continue.
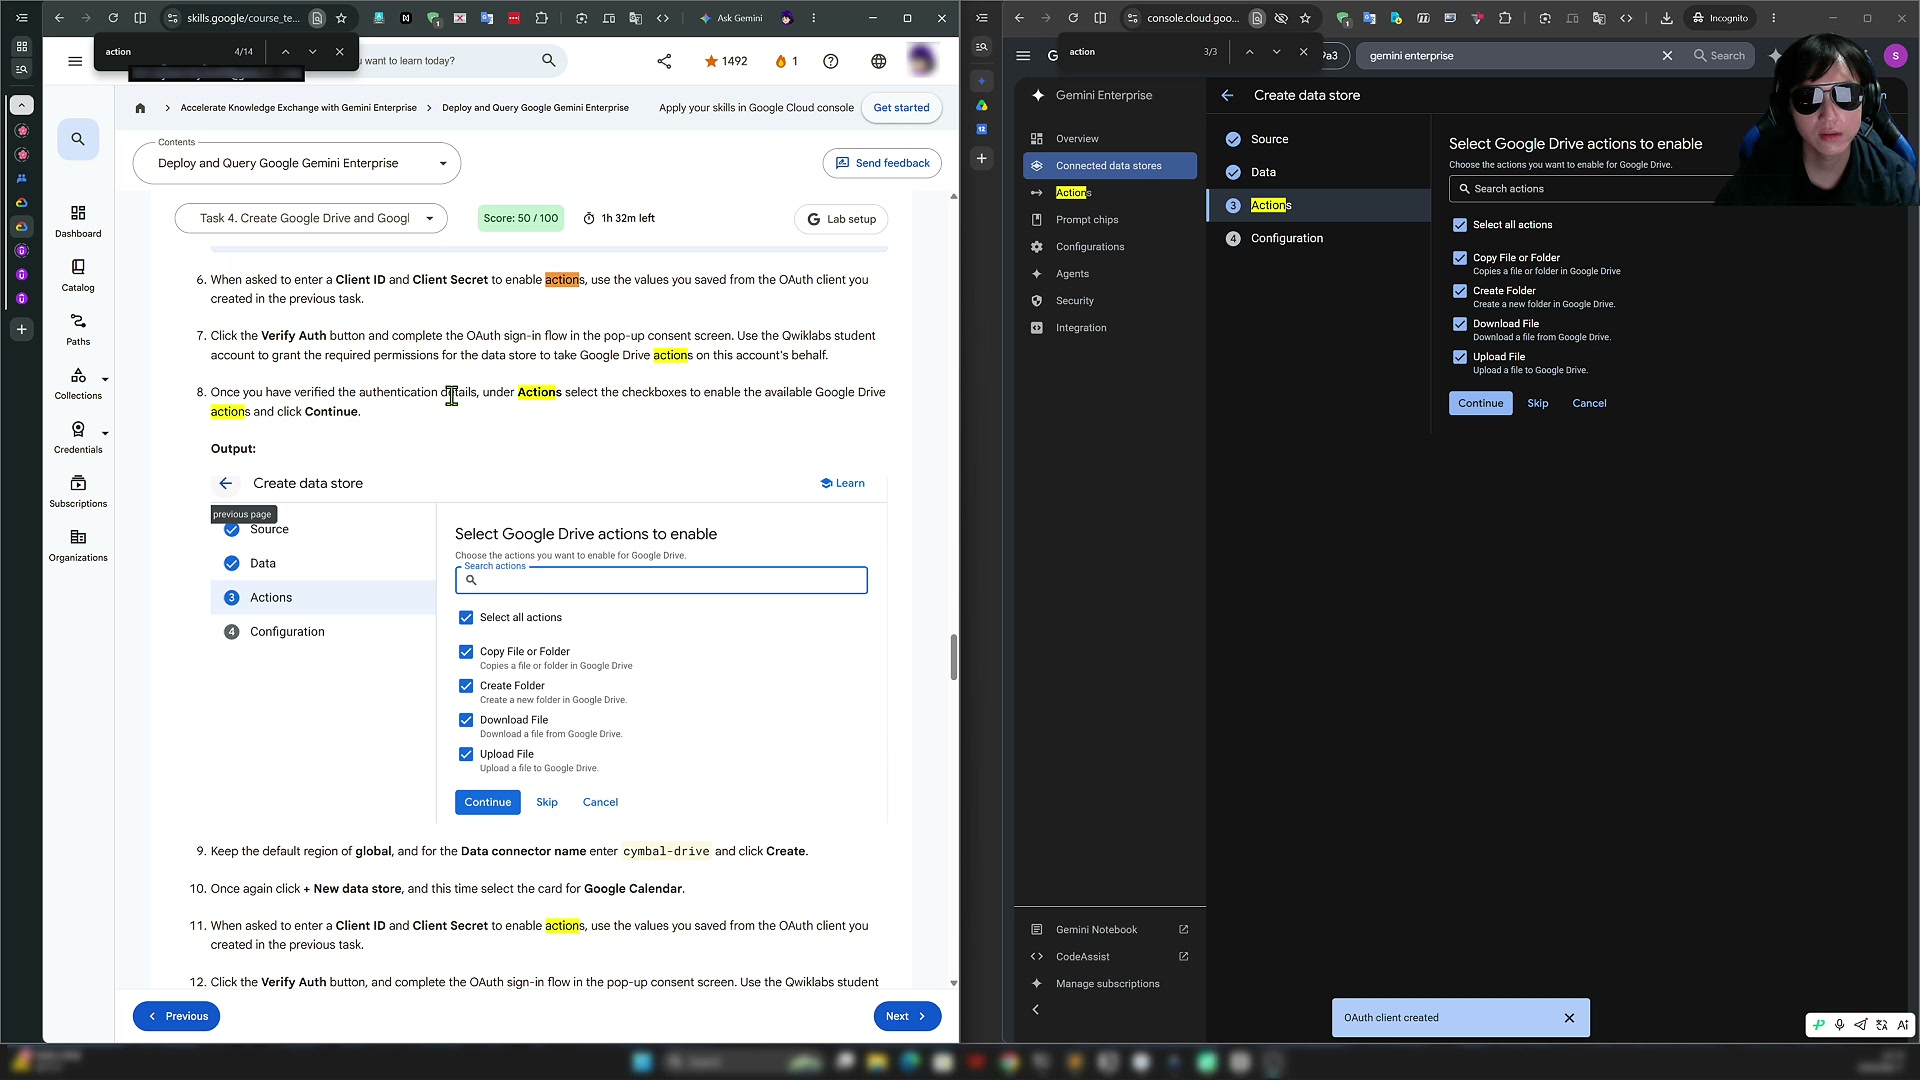
- Keep the region at Global, enter the lab-specified Data connector name, and click Create.
Now connect Google Calendar the same way: click New data store again, pick the Google Calendar card, enter the same Client ID / Secret, check the available calendar actions, name the connector, and create it.
Both Google Drive and Google Calendar data stores are now added to Gemini Enterprise. Check My Progress — Task 4 complete.
8. Task 5: Query the Assistant
The final task and the most rewarding one: actually asking questions.
Step 1 — Wait for the data stores to be ready. Data stores start in a Creating state and take a few minutes. You can proceed once both Google Drive and Google Calendar show Active (both the connected state and the action state). In practice, Calendar usually turns Active first.
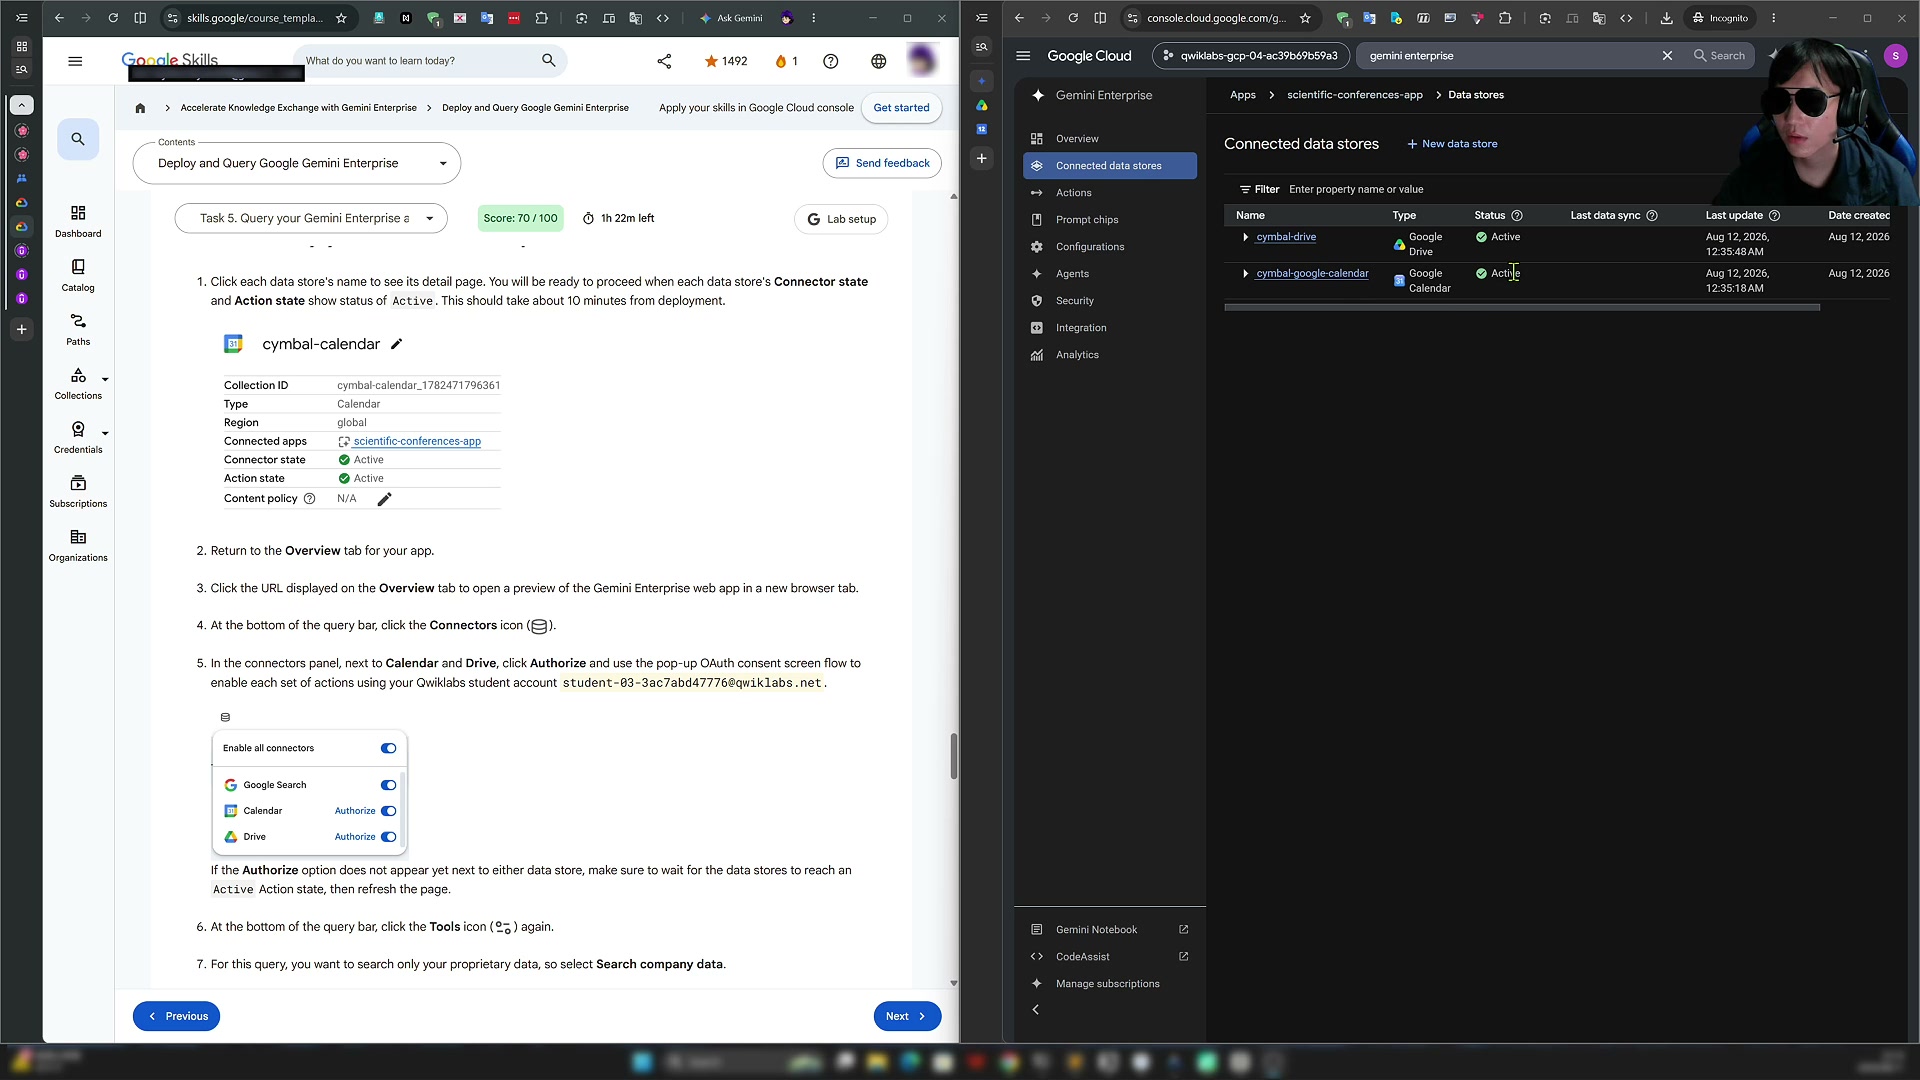
Observability bonus: inside a data store, the Authenticated/Editor view shows automatically integrated logs (Logs Explorer). If anything goes wrong in the backend, you can investigate from the logs — very friendly for enterprise use.
Step 2 — Open the web app preview. Go back to the Overview tab, copy the URL shown there, and open it in a new browser tab. That's the Gemini Enterprise end-user UI — it looks very similar to the consumer Gemini web version.
Step 3 — Enable the connectors. At the bottom of the query bar, click the Connectors icon (note: the icon in the current version differs from the old one in the lab manual), and the panel shows Calendar and Drive. As an end user, click Enable Actions on each (the older UI labels it "Authorize") to authorize them.
Then, in the query bar's Tools icon, enable Search company data so searches only hit your proprietary company data. Regular end users can't pick a model — that's an admin setting.
Step 4 — Ask questions. Three typical uses, one by one:
① Retrieving key takeaways: Ask for the key takeaway of a specific session across Days 1–3 of the PlanetCon conference. The assistant returns a structured, multi-level search result and lists the source documents (Sources) behind the answer — you can always verify which company file it's answering from.
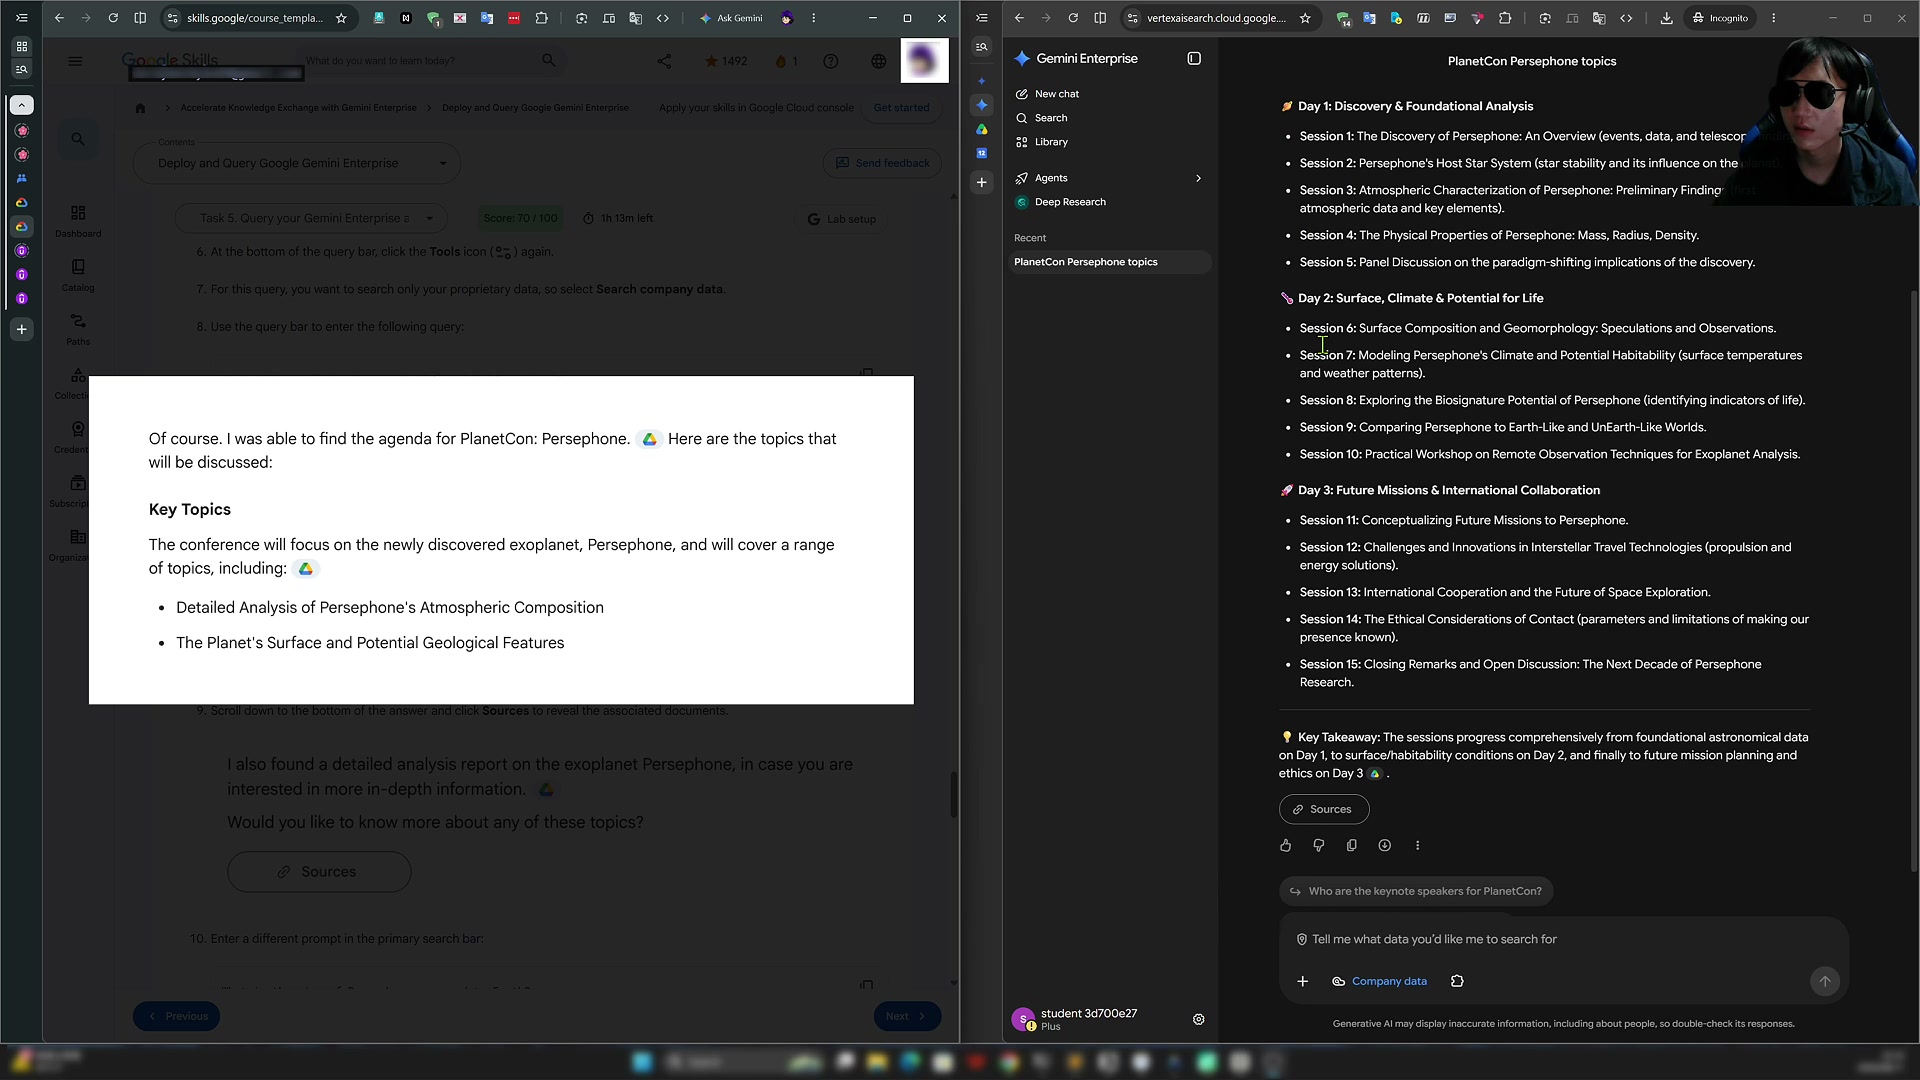
② Summarizing a document: In the search bar, give a summarize instruction, select the specified PDF (e.g., the analysis report file), and press Enter. The assistant generates a structured summary based on the document's content. As an admin, you can also use this area to restrict which data end users can access.
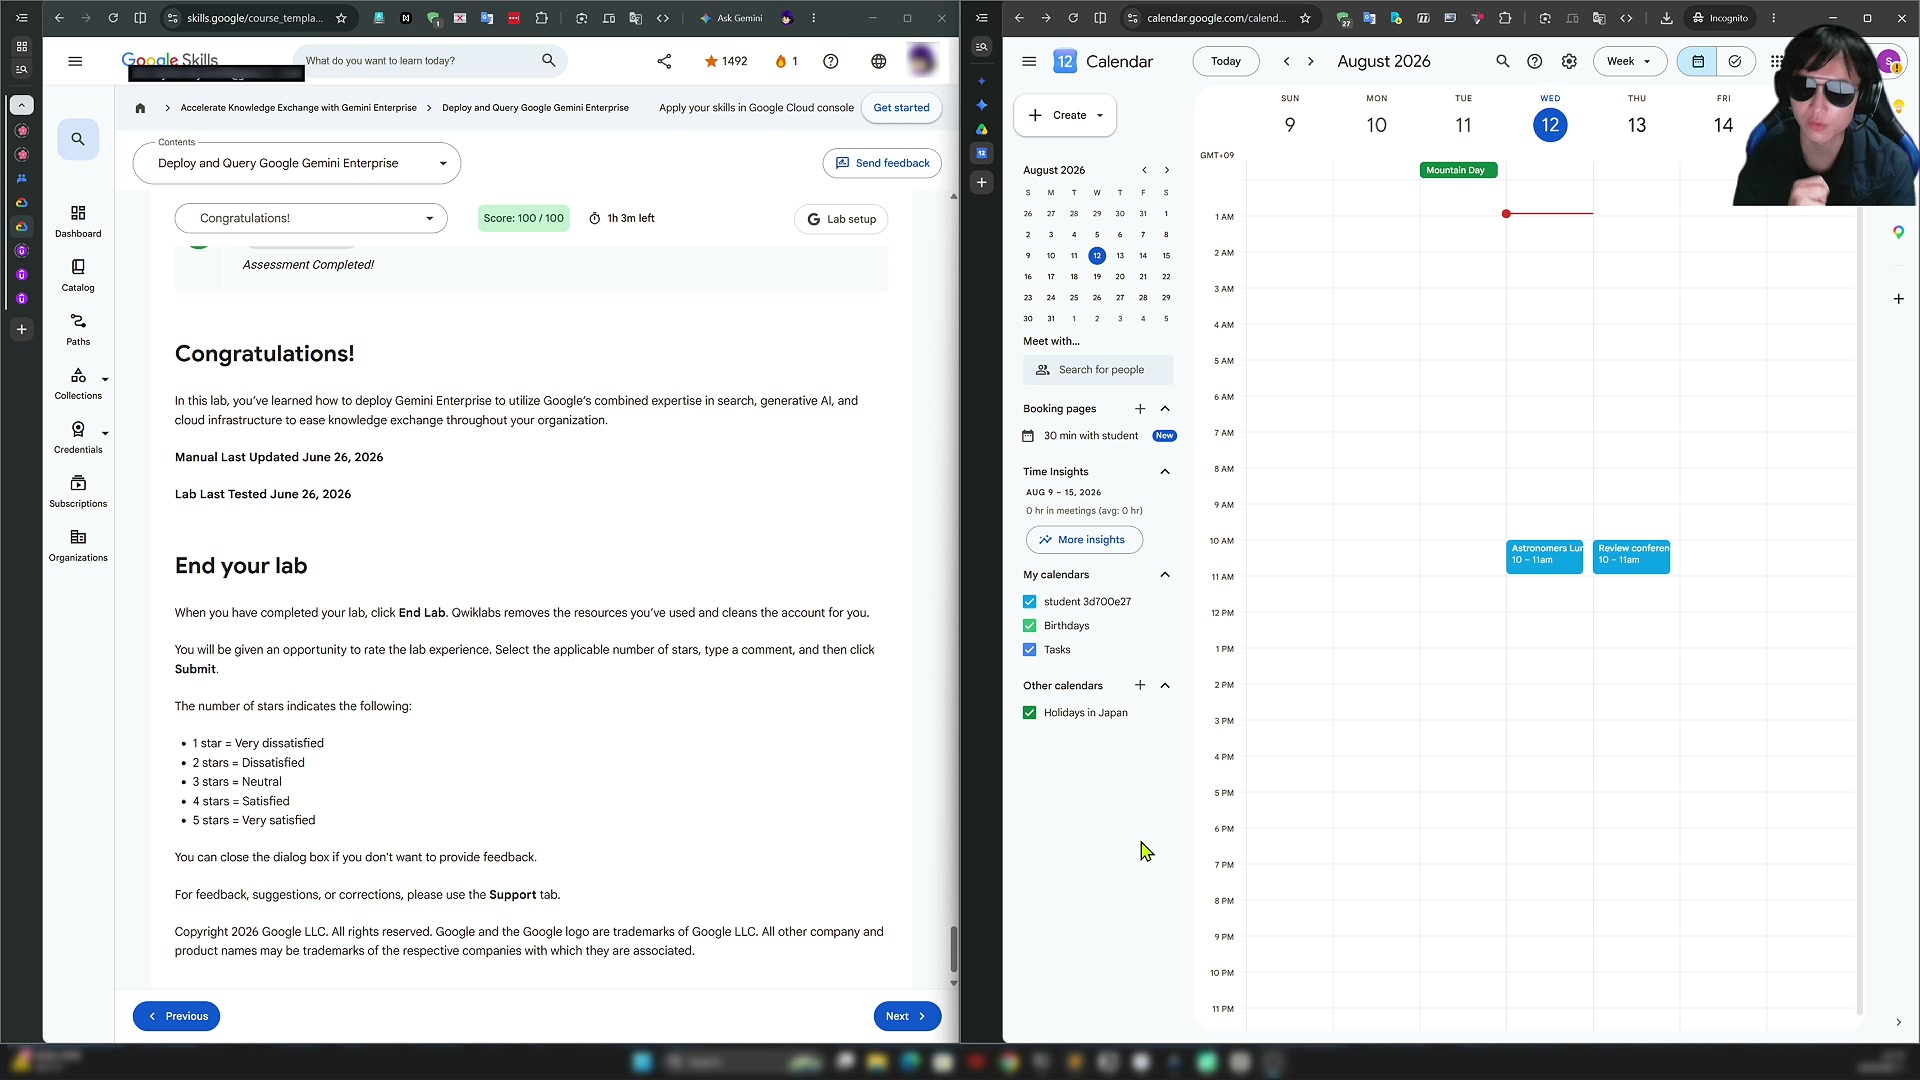
③ Creating a meeting: Type "Create a one hour meeting tomorrow." The assistant drafts the meeting (start/end times, summary, attendees) and waits for your confirmation — click Approve, and the event is created in Google Calendar. Head back to Calendar and you'll find the AI-scheduled event sitting there.
Finally, return to the lab and click Check My Progress — all five tasks light up.
9. Summary and Next Steps
Here's the five-task arc in one table:
| Task | What you do | Key deliverable |
|---|---|---|
| Task 1 | Prepare the data | Two files on Drive + a calendar event |
| Task 2 | Create the app & identity provider | Gemini Enterprise app (Google IdP) |
| Task 3 | OAuth consent screen & client | Client ID / Secret + JSON config |
| Task 4 | Connect data stores | Drive & Calendar both Active |
| Task 5 | Query the assistant | Search, summarize, auto-create a meeting |
The author's honest first impression: the usage feels nearly identical to the daily Gemini app/web version, so the barrier to entry is low. But that's not all Gemini Enterprise can do — you can build your own applications, integrate them with various Google Cloud services, and connect them to Gemini Enterprise. That's exactly the direction the series will explore next: custom agents, Deep Research…
Want to try it yourself after reading? Open Google Cloud Skills Boost, search for GENAI082, and press Start. See you in the next episode!
This article is the written companion to Episode 1 of the Gemini Enterprise practice series. Images are keyframes extracted from the screen recording, matching the actual UI shown in the video.